반응형
1. 동작 방식
스프링 부트는 실행되는 순간 먼저 templates에서 retrun된 파일을 찾는다. 만약 없을 경우 static 파일의 index.html을 찾아 값을 보여준다.
2. Controller 알아보기
1. 매개변수가 삽입된 Controller
//매핑할 url
    @GetMapping("hello")
    public String hello(Model model) {
        //data라는 키값을 이용하여 hello! 라는 value값으로 대체
        model.addAttribute("data", "hello!");
        //hello라는 이름의 템플릿을 뷰 리졸버가 찾아서 리턴
        return "hello";
        //spring boot dev tool 라이브러리 사용 시 재시작없이 리컴파일이 가능
        //컨트롤러를 먼처 찾고, 그 후 정적 컨텐츠를 찾는다
    }
먼저 @GetMapping을 사용하면 주소창에 "/"를 기준으로 입력하여 값을 볼 수 있다.
model의 addAttribute의 data를 키값으로 하여 hello!라는 value값을 넣어주고, hello를 return하게되면
templates 폴더의 내부에 존재하는 hello.html을 찾아 페이지를 띄워준다.
<!DOCTYPE html>
<html xmlns:th="http://www.thymeleaf.org">
<head>
    <title>Hello</title>
    <meta http-equiv="Content-Type" content="text/html" charset="UTF-8">
</head>
<body>
<p th:text="'안녕하세요.' + ${data}">안녕하세요 손님</p>
</body>
</html>
안녕하세요 손님은 무시해도 된다..
${data} 부분에 키값이 매핑되어 value값이 hello가 나오게 된다.

위 화면처럼 나타나게 된다!!
2. @RequestParam을 이용한 매개변수 파라미터 형식 삽입
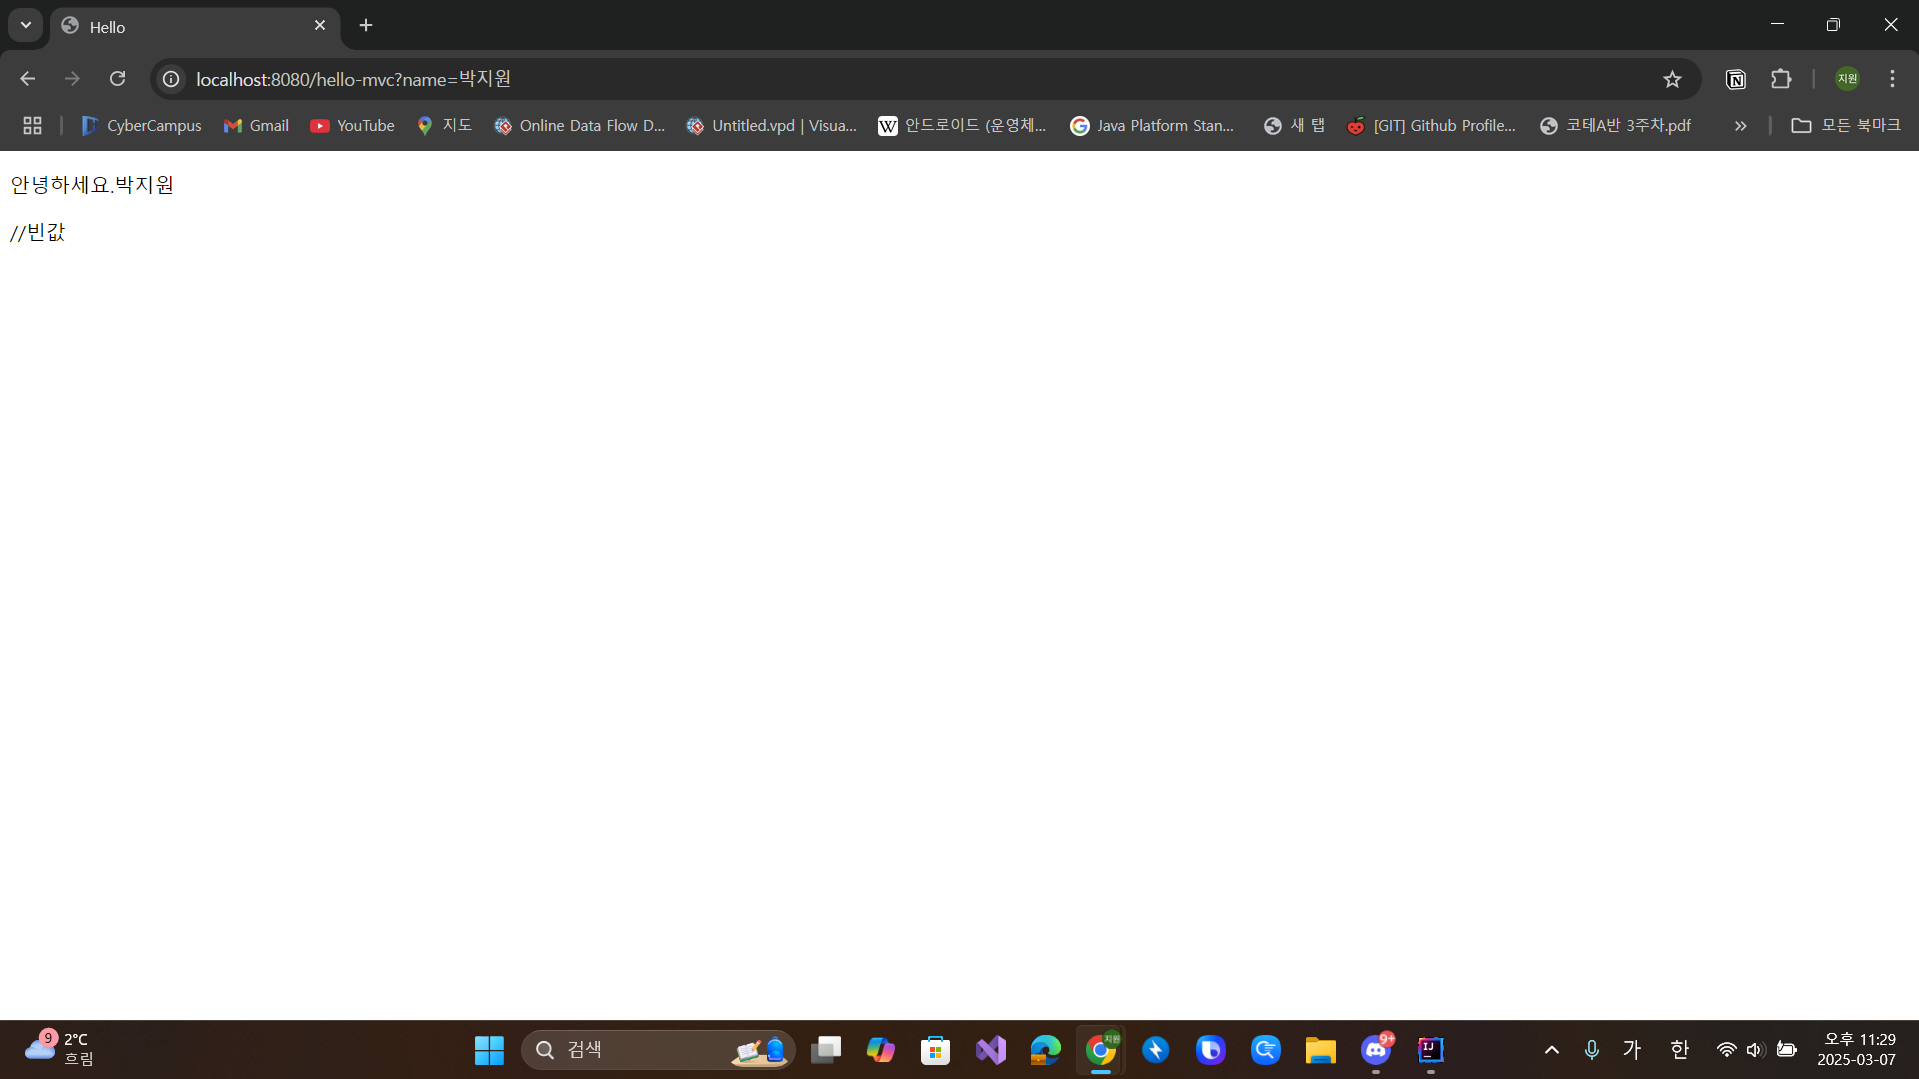
@GetMapping("hello-mvc")
public String helloMvc(@RequestParam("name") String name, Model model) {
    //require = false로 반드시 넣지 않아도 되는 값으로 설정 할 수 있다.
    //http://localhost:8080/hello-mvc?name=박지원 << 이렇게 넣어주면 동적으로 매핑하여 실행한다.
    model.addAttribute("name", name);
    return "hello-template";
}
<!DOCTYPE html>
<html xmlns:th="http://www.thymeleaf.org">
<head>
<title>Hello</title>
<meta http-equiv="Content-Type" content="text/html" charset="UTF-8">
</head>
<body>
<p th:text="'안녕하세요.' + ${name}">hello empty</p> //빈값
</body>
</html>
위와 비슷하게 삽입된 매개변수를 통해 동적으로 나타나게 된다.

이런식으로 넣을 수 있다
3. @ResponseBody를 통한 값 전달
@GetMapping("hello-string")
@ResponseBody
public String helloString(@RequestParam("name") String name) {
    return "hello " + name; //이 방식은 데이터를 그대로 내려준다.
}
@ResponseBody를 사용하면 해당 파라미터의 값이 그대로 보여진다.

4. Api 형식의 객체 반환 형식
@GetMapping("hello-api")
@ResponseBody //응답 객체
public Hello helloApi(@RequestParam("name") String name){
    Hello hello = new Hello();
    hello.setName("박지원");
    return hello;
    //default는 JSON으로 반환, XML도 가능
}


static class Hello{
        private String name;

        public String getName(){
            return name;
        }

        public void setName(String name){
            this.name = name;
        }
    }
3번의 방식을 응용하여 Json 형태로 반환할 수 있다. 자동으로 Json 형식으로 반환해준다고 한다.
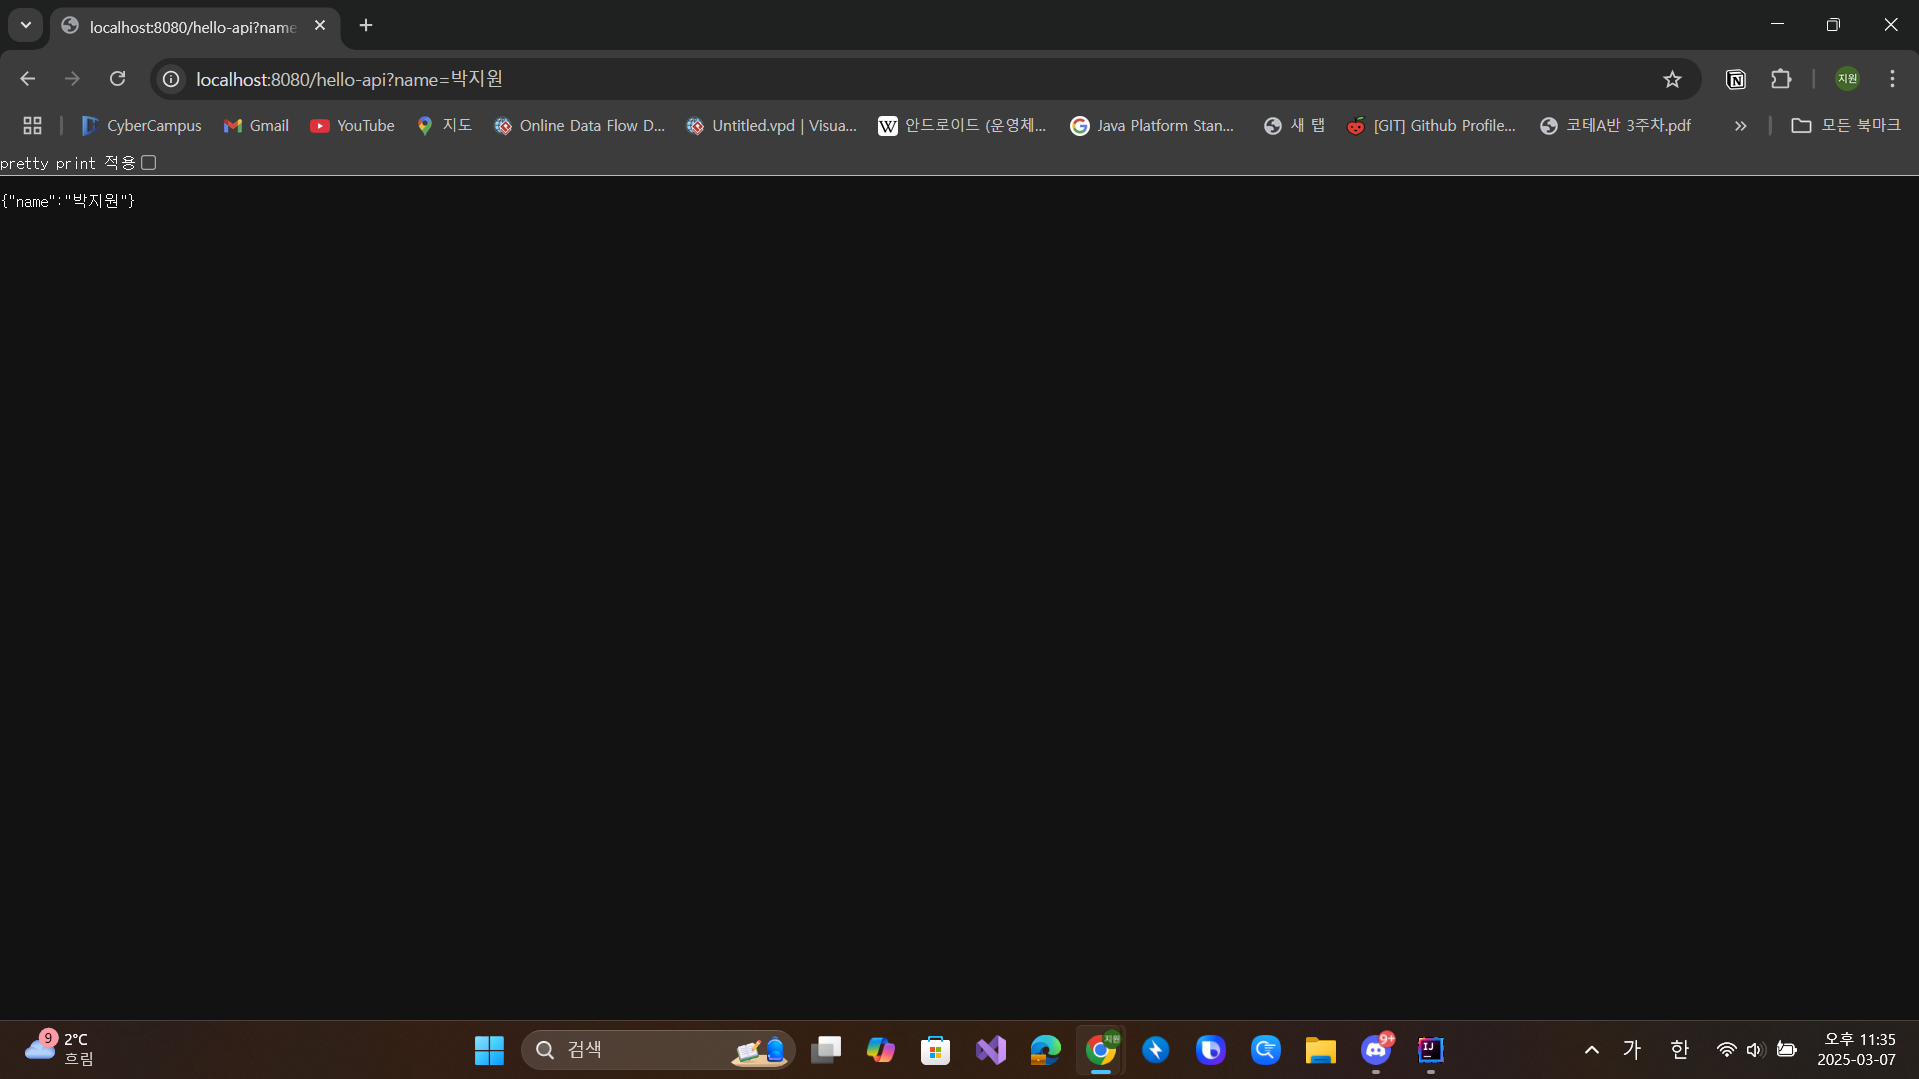
실제 협업 시에 해당 방식의 Json포맷으로 통일하여 값을 주고 받을 수 있다.
728x90
반응형
'BackEnd' 카테고리의 다른 글
| 5/23 - 서블릿, 쿠키와 세션, 필터와 리스너, JSP (0) | 2025.06.01 |
|---|---|
| 5/22 - Servlet, 쿠키, 세션 (0) | 2025.06.01 |
| 5/21 - 서블릿 응답 처리 방법 (0) | 2025.06.01 |
| 5/20 - 톰캣, 웹 서버 프로그래밍, 서블릿 (1) | 2025.06.01 |
| Bean 등록 (1) | 2025.03.08 |


